

RaspiBackup created by framps. Current version is 0.6.6 with V0.4.3.5 UI. This shell script can create backups from a running Raspberry Pi without power off or manual intervention. With the wrapper shell script (located in GitHub, helper folder), you can customize the process before or after the RaspiBackup shell script. The backup image is created with dd, tar or rsync with hardlinks.
This post will include how to setup RaspiBackup, backup to internal/external NFS drive, modify the wrapper shell script and restore the backup.
https://github.com/framps/raspiBackup, https://www.linux-tips-and-tricks.de/en/quickstart-rbk/
Setup RaspiBackup
To install the latest version, run the following command:
curl -sL https://raspibackup.linux-tips-and-tricks.de/install | sudo bash
There are only two language, English and German. Select “M2 Install components” to install the shell script. In “M3 Configure major options”, you can configure the Backup path (C2), number of backups (C3), how many partition need to backup (C5), what service should pause when backing up (C6), information message verbosity (C7), report backup status by email (C8) (required email setup), setup regular backup (C9).
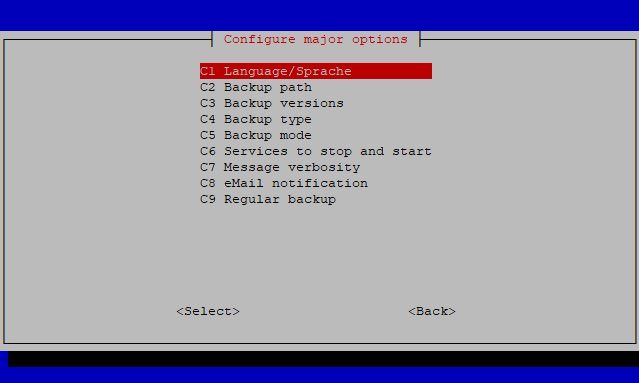
You can also download the RaspiBackup.sh from GitHub without installUI, all options is listed in the Users guide. With the UI, you can configure the major options. We recommend to save the backup image to you external drive, such as NAS, USB, NFS. If you need to save the backup image internally before moving to other location, please exclude the backup path using “-u” option.
C2 Backup path
If you know how to mount the drive or network location constantly or automatically, you can just type the path (e.g. \mnt\sda1\Backup). It will generate a directory with current computer name.
If don’t know hot to mount, please check auto-mount.
C3 Backup versions
There are two different version control provided. You can set only keep a maximum number of backups, or smart recycle (https://www.linux-tips-and-tricks.de/en/smart-recycle/). The smart recycle can set how many backups for days, weeks, months and years to keep.
Smart recycle
e.g. 7/4/12/4, it will keeps 7 recent days of backups, 4 recent weeks of backups, 12 recent months of backups, and 4 recent years of backups.
Total version of backups will be 7+4+12+4 = 27.
C4 Backup type
RaspiBackup provide different type of backup methods. You can choose a suitable method using this table.
| Method | Independent backup | Backup size | Backup time | Compress | CPU usage | Single file restore | Supported filesystem | Supported network backup |
| dd | ✔ (block by block) | Largest | Long | High | All* | SMB/CIFS/NFS | ||
| ddz* | ✔ (block by block) | <=dd | >=dd | ✔ | High | All* | SMB/CIFS/NFS | |
| tar | ✔ | Medium | Medium | Medium | ✔ | All* | SMB/CIFS/NFS | |
| tgz* | ✔ | <=tar | >=tar | ✔ | Medium | ✔ | All* | SMB/CIFS/NFS |
| rsync w/ hardlinks | X | Smallest | Shortest | Low | ✔ | ext2/3/4 | NFS | |
| rsync w/o hardlinks | ✔ | =tar | =tar | Low | ✔ | All* except NTFS | SMB/CIFS/NFS | |
| *With wrapper script | *Backup size<4GB with fat32; |
C5 Backup mode (Partition)
For some of Linux OS and user, there might be more than two standard partitions (boot partition & system data partition).
You can use the fdisk command to check the number of system partition (mounted only):
sudo fdisk -l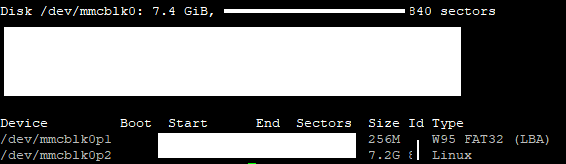
The example result shows only two system partitions. Please ignore the ram disk, more information in fdisk and tmpfs ram disk.
Normally, the disk with “Boot” column and “mmcblk0p” name will be your system partitions. Other disks without “Boot” column will be external device (e.g. USB) or extra hard-disk without containing system partitions.
More information for backing up partition >2 will explain if needed.
C6 Service to stop and start
None of the services should running if there are data changes made during backup, this option will show all the running services as a list. You should select the services that might have data changes during backup.
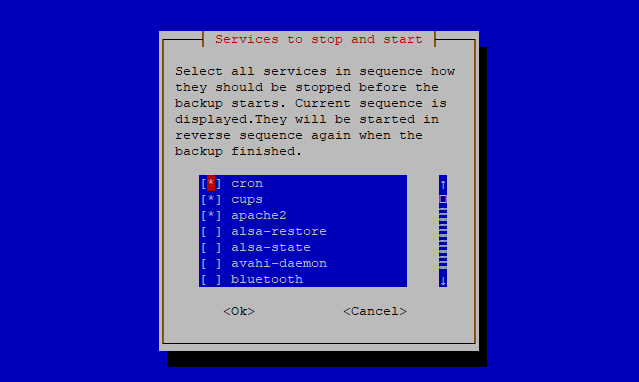
You will need to prioritize the services after the selection, the script will stop and resume the selected service before and after the backup process.
Here is some of the service that might have data integrity problem which will causing an unbootable backup or application/service crash inside the restored backup. If you can confirm that the service won’t have I/O, you can ignore it. Better checking this when installing/modifying services.
| Services | Reason |
|---|---|
| Apache2 | Web Server will have data I/O |
| Cron | Scheduled data I/O script might started during the backup. |
| Cups | Printing service will cause data I/O |
| mysql | database servce will have data I/O |
| nfs-kernel-server | NFS sharing server will have data I/O |
| nginx | Web Server will have data I/O |
| pilight | Program might have data I/O |
| samba | SMB/CIFS share folder will cause data I/O |
| WordPress | Website content management system (CMS) will have data I/O, please prioritize to stop wordpress first before web server apache2/nginx |
C7 Message verbosity
The script will generate a log file for each backup (locate at the root of backup). For debug purpose, you can choose either display all message or just important message.
C8 eMail notification
You can setup the email notification for each backup process, it will shows whether success or not.
C9 Regular backup
You can setup the schedule backup in this setup interface. However, wrapper script (e.g. auto mount & dismount) cannot be executed.
You can set which weekday & time to start the backup. The schedule crontab is under “/etc/cron.d/raspBackup”.
Advanced script
To avoid the virus infect the backup via the devices, you can set the mount and dismount functions with the backup script via wrapper script.
You can download the wrapper script from the GitHub page: https://github.com/framps/raspiBackup/blob/master/helper/raspiBackupWrapper.sh
There are different Wrapper script under the helper folder, please learn it yourself.
Adapting the script
First, you need to edit the wrapper shell script first. You need to change the Line 46-50 of the shell script. The line 47 is the backup point, you need to change the line 48 to the destination folder or “$BACKUP_MOUNT_POINT” if you are using the root folder as your backup location.
If you need to backup two device under the same backup point, better mounting the destination folder as you root to isolating the backups. E.g. Mounting network folder \\192.168.1.200\Rpi1 as /mnt/backup/ for Rpi-1, and \\192.168.1.200\Rpi2 as /mnt/backup/ for Rpi-2. Then both BACKUP_PATH are “$BACKUP_MOUNT_POINT”, and both BACKUP_MOUNT_POINT are /mnt/backup.
If /mnt/backup folder is not yet created, please use the mkdir command to create the folder first.
mkdir /mnt/backupThen change line 173 to mount your network folder / USB as your backup point.
If your network folder didn’t have any authentication, simply replace line 173 with following command (Remember to test the command first).
mount \\192.168.1.200\Rpi1 $BACKUP_MOUNT_POINTCopy the Wrapper script to the same location of your raspBackup.sh. Usually under
/usr/local/bin/Remember to grant execute permission for the wrapper script using chmod command.
The crontab job will be under /etc/cron.d/raspiBackup , change the target to the wrapper script /usr/local/bin/raspiBackupWrapper.sh
You can test the wrapper script using
sudo /usr/local/bin/raspiBackupWrapper.shCheck if any error occurred.